So, you have got yourself a proper coop for your chickens. Well, a proper coop is just half of the story. The other half would be the door. Without the door, the birds are as secure as keeping them out in the field. That is why most of the chicken keepers put proper emphasis on the door.
However, getting or building a proper door will get you nowhere if you do not know how to install chicken coop door. But you do not have anything to worry about because we are here to take care of that. We have installed more than 20 doors on different coops.
So, you can tell how much of an experience we have. And from this experience, we have decided to make an easy-to-follow guide for the people that are just getting into bird keeping. Let us not waste any more of your time and get right into the guide, shall we?

How to Install a Chicken Coop Door?
As you know by now, there are different types of doors. Some prefer the regular manual version of the door, while others like the features that the manual sliding doors offer. Well, we are going to go through all of them.
Manual Hinged Door
The hinged door is one of the go-to options for many. The reason behind it being a go-to option for many is for having a simple installation procedure. And even though the installation process is simple, it is not one bit behind in terms of providing the protection that a door should offer. With the introduction out of the way, let us have a look at the steps you need to go through to install this door:
Step 1: Select the Right Placement
Before anything else, you need to first select the right placement for the door. If you have got the right-sized door for the opening, then this step will be reasonably easy for you. However, if the door does not have an appropriate size, select the place where the door would be able to close the opening properly.
When selecting the placement, you need to keep another thing in mind, which is whether you can install the hinge on either side of the door or not. If the side placement is not possible, you need to install it on the top or the very bottom of the door.
Step 2: Install the Hinge on the Door
After the placement is figured out, you need to install the hinge. We would recommend installing it on the door first. However, do measure the door and install the part in the very middle. Also, if the door is a bit large in size, you might want to install two hinges.
On that note, for installing the hinge, you might need to drill on the wood. However, if you do not want to handle drill machines, you can opt for nails. Those are going to do a proper job in securing the hinge. However, if you are planning to nail them, then we would recommend opting for two hinges for additional security.
Step 3: Install the Hinge on the Coop
Once one part of the hinge is on the door, you need to work on the coop. Follow the same process as you followed for installing the hinge on the door. But do make sure that the measurements are correct, or else the door is going to sit crooked, and it will not be able to close the opening properly.
Step 4: Install a Locking Mechanism
Apart from just installing the door, we would highly recommend installing a locking mechanism. Without this, the coop will not be safe from predator attacks. For the hinged door, install the lock on the other side of the hinge. Do ensure that you install this properly, or else it will be fairly easy to tamper and bypass.
Manual Sliding Doors

One of the doors that has been gaining quite a good amount of popularity is the manual sliding doors. They can offer a bit of what automatic doors can offer but at half of the cost. And if you are struggling to install one of these, then refer to this guide.
Step 1: Get Three Pieces of C Channels
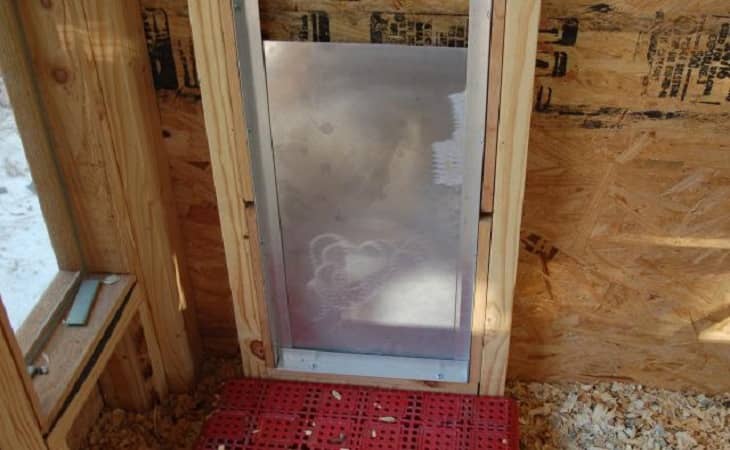
For the sliding doors, you would something that will hold the door and allow them to slide at the same time. And for this, the C channels are a perfect pick. Now, if you are wondering what C channels actually are, they are a piece of aluminum, which has a C-shape. Get three pieces of these.
Step 2: Measure and Cut the C Channels
After sourcing out the C channels, you need to measure the opening of the coop. Measure the length and mark it on two of the pieces of the C channel by adding one or two inches more. Then, measure the width and mark it on the last piece of the channel but adding the same one or two inches more.
On that note, do not add the extra inches if the door is not that larger than the opening. In other words, you will need to consider the length and the width of the door before cutting. Once the channels are marked, you need to cut them. For this, you can use a grinder. Use that to get clean cuts on the channels.
Step 3: Install the C Channels
Now that you have cut the channels, you need to work on installing them into place. Remember the extra length you added during marking and cutting the channels. Well, you need to set them up accordingly in this step.
But before installing the channels on the coop, you need to drill some holes. Two each channel should be enough. But if the door is large in size, we would recommend drilling at least three holes on the channels. Then, line the channels up and prepare to install them on the coop.
You might need to rely on nails for this. But if you want to make the whole system achieve a higher level of strength, opt for the bolts. However, you would need to drill holes on the coop for this. To do that, first, hold the channels on the walls of the coop and mark the holes you made on the channel.
Once the holes are marked on the wall, get yourself a drill and install the right diameter bit. The diameter of the bit will depend on the bolts you are planning to use for the process. However, we would recommend sticking with the small or medium-sized ones. Then drill the holes on the wall of the coop.
After drilling the holes, hold the channels on the wall and pass the bolts through the holes. Fasten the bolts using the washer that came with the bolt, and then the channels should be in place. Also, do note that you would have to install two length-wise and one on the bottom width-wise.
Step 4: Slide the Door in
After installing the C channels, you need to check whether the door can slide through the channels or not. If you notice that the door is too small for the channel, then the cuts are too big. Take the C channels out and measure and cut them again.
However, if the door is too large for the channel, you need to work on a different set of channels. Do double-check the measurements before cutting, or the door will not slide through this time either.
Step 5: Install a handle or rope
If you want to operate the sliding door with a handle, you need to install a handle on the very middle of the door. Do make sure that the handle is large enough to let you get a firm grip. After that, align the handle and screw it onto place.
However, if you want a sliding door that is operated using a hope, you would need three eye hooks. Install one on the very top of the top. Make sure that this hook is not hindering the movement of the door. And screw another one a bit higher than the door. The second hook will be on the coop’s wall, and it should be vertically up.
The last hook would be horizontally right or left of the second hook. For the positioning, consider the placement of the opening. Then drag a rope through the hooks and tie one of the ends to the hook on the door. And you should have a manual sliding door.
Final Words
As you can see, learning how to install chicken coop door is pretty easy. All you need to factor in is the measurement of the doors and the installation procedure. Also, if you follow the steps properly, you should end up with a perfectly placed door on the coop.
