Which one do you prefer, a chicken waterer that is pre-made or the one you build on your own? Building a chicken waterer can be somehow challenging. Still, many people prefer to use the DIY approach because it offers multiple advantages compared to buying it from the store. A DIY chicken waterer best suits many people because it can be customized easily in their size and design.
A chicken coop can’t be complete without a source of freshwater for the chickens. This is because chickens mostly feed on dry feeds, which dehydrates them, hence the need for water for hydration and other essential functions
This article will guide you to know some of the importance of using the DIY chicken waterer, the DIY chicken waterer ideas, and there uses in the chicken coops.

Importance Of a DIY Chicken Waterer
A large percentage of the chicken’s body constitutes water, so water is essential in the chicken coop or anywhere in your backyard. The amount of water a chicken drink depends on factors like age, season, laying, and time of the day. Below is the general importance of having a DIY chicken waterer.
A DIY chicken waterer is the surest because you are pretty much aware of the craftsmanship. You know how strong your chicken waterer is and whether it needs any reinforcement or not.
Building your chicken waterer gives you greater control because you know the number of chickens it will serve and the design you like most.
You get financial benefits when you make your waterer because you will use locally available materials, unlike the pre-made one. Just look around your backyard and you can’t miss a gallon bucket lying idle.
With a DIY chicken waterer, you will eventually have the privilege of experiencing your labor’s fruits.
A chicken waterer is essential because it keeps the chickens healthy and over-productive throughout. Clean water keeps the chickens hydrated always.
Factors That You Should Consider When Maintaining You DIY Chicken Waterer
Clean Water
Access to clean water always makes your chickens healthy and happy to ensure that the waterer is clean still if you want the best for you chicken.
Spill
Nobody desires a stinking coop. You can prevent this if you ensure that your waterer does not spill or drip water always. A dry coop will decrease the risk of diseases such as coccidiosis into your existing diy chicken feeder and other areas.
Pest Proof
You should ensure that your chicken waterer’s source of water is not open because rats might come to drink water from there and this might end up contaminating the water and posing health risks to your chicken,
Easy To Build
It would help if you also determined the time it will take you to be fully complete and be used by the chickens. Consider providing a learning curve for your chicken.
Reliability
You should ensure that your DIY chicken waterer can work consistently without failure. A reliable waterer will make you less worried that your chickens might run out of water.
Chicken Preference
You must understand that chickens get scared easily with new things. Therefore, they are likely to appear as if they don’t want a new waterer. but this should not scare you because you can train them gradually.
How To Build a DIY Chicken Waterer
Knowing the importance of a chicken waterer. let us look at how you can make a homemade chicken waterer.
Materials that you require to make are;
Drill saw
A bucket
Teflon tapes
Watering cups
Step by step guide
Drill Holes For The Watering Cups
Identify the right place where your watering cups will be and bear in mind your chickens’ height because some may be short and others long. A concrete block is best for your waterer to rest on once it is complete, but that depends on what you like.
Drill the holes in the identified locations using your 3-inch bit on the drill saw. These holes should be adequately spaced to allow enough chickens to use the waterer at once.
Fit The Watering Cups To The Bucket
With the help of a Teflon tape, wrap the threaded end of the watering cups all round until it gets tight enough so that it can be wedged in the holes.
Insert the threads into the holes firmly without hesitation because if you don’t do that, there is a possibility that water will leak from the pits. To attain this, rotate clockwise while slowly starting and increasing the pressure gradually.
After fitting the watering cups, position it so that the spoon-looking attachment can easily collect water.
DIY Chicken Waterer Ideas That Will Help You Keep Your Water Safe
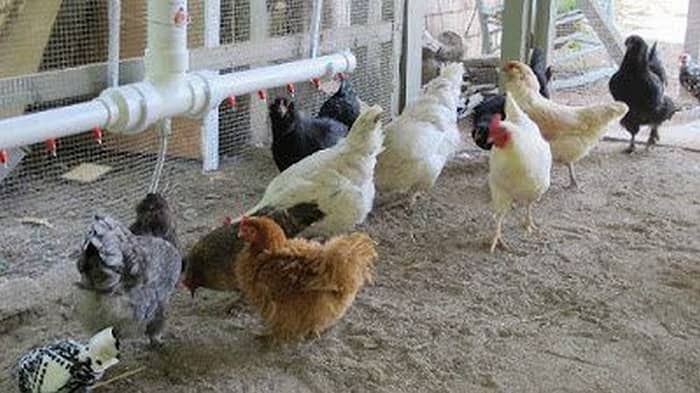
PVC Chicken Waterer
If you don’t want to have the experience of those people who use chicken water cups as their chicken waterer, This DIY chicken waterer is the one that will solve your problems. It has a large space that ensures it carries enough water at once. It works in a way that a good number of cups get attached to the pipeline while at the top, there is a source of water.
The materials you require include;
- Small PVC pipe
- PVC joints
- PVC couplers
- Small cups
- Threaded caps and some other materials
Within a few hours, you shall have completed the project. Stick to the step by step plan, and you will ever smile seeing your chicken enjoy their meals as they drink clean water from the inexpensive DIY chicken waterer.
Glass DIY Chicken Waterer
This is yet another cheap and easy to make DIY chicken waterer. You must have a canning jar, clean it thoroughly, and make sure nothing is left inside. At the bottom, drill a hole while ensuring the edges are flattened. With a glass bowl, keep filling the jar’s water—a simple to make chicken waterer.
DIY Heated Chicken Waterer
At times weather changes, and you might find that it is too cold, and you will want to turn to the heated chicken waterer along with using a proper chicken coop heater.
This will mean that you must have access to electricity. Therefore, it is good to set your coop near the outdoor outlet or be a master DIYer enough and build it with electricity,
A heated chicken waterer can ensure that you have your chickens enjoying even when the temperatures are worse.
Easy Fill DIY Chicken Waterer
We also have this type of chicken waterer designed so that you don’t need to go right to your cage for a refill.
Materials required are:
- PVC pipe
- A five-gallon bucket
- Oil pan
- PVC cement
- PVC fittings
A gasket
After constructing this DIY chicken waterer, you will enjoy it because rain will no longer interrupt you. After all, the Bucket is held in the oil pan, and the pipe will be extended outside, making it easy to refill from the outside.
How To Clean a DIY Chicken Waterer
Like humans, chickens require fresh water to live a healthy life and produce fresh eggs and fresh meat. Therefore, it is vital to frequently clean the chicken waterer because chickens can sometimes contaminate them with their droppings, and if they are at the lower end, some might keep standing on them while drinking water.
Chicken waterer cleaning is the same regardless of the product you use. What can differ is the cleaning frequency.
A DIY waterer requires cleaning every time you are refilling compared to when one is using an automatic chicken waterer. However, you must develop routine checks on your waterer and clean it wherever dirty.
Materials that you require to clean it are water, a brush, and an apple cider vinegar.
Step By Step Guide
Put the Apple cider vinegar inside your DIY chicken waterer and leave it to settle at the bottom. For the deep waterers, you can purchase a wholesale brand. Ensure it is enough for you to scrub it around the entire waterer. Keep it away from chicken coop heater and chicken defeathering machine to be safe.
After a few minutes of dumping the vinegar, you can now scrub the waterer thoroughly to ensure that you remove all the dirt gathered there.
After that, you can now remove the apple cider vinegar from the waterer and scrub the sides with clean hands, or you can rewash it before dumping out that water.
Once you have followed the above processes, your chicken waterer will be clean enough to be refilled with fresh water until the next refill. However, you are not supposed to leave water in the waterer for long because they contaminate it easily.
If you realize that your chickens are not drinking more water, try making smaller DIY chicken waterers avoid easier contamination.
Conclusion
The above discussed DIY chicken waterer advantages and ideas are meant to help you get maximum productivity from your chickens because most of them are cost-effective. However, you are supposed to ensure that you have put all the factors discussed above into consideration before you decide on the best DIY chicken waterer to use.
By doing this, you shall rest assured that your chickens always stay happy and healthy, which should be reflected in their egg production and health condition.